DentistryCourse bundleProsthodontics
Dennis Hartlieb’s composite and veneer library — 13 chairside technique courses, 357 short clips
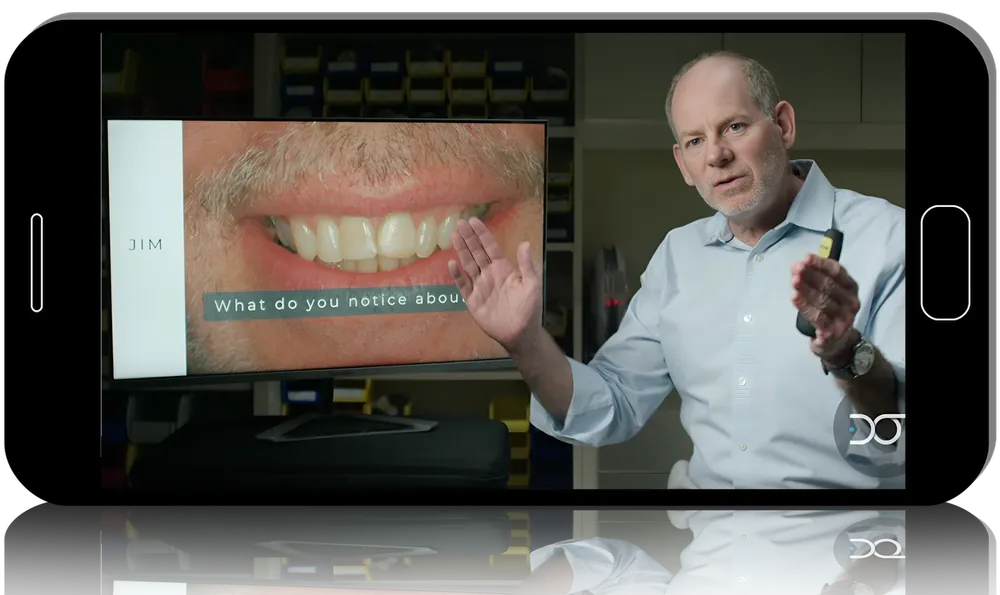
Cosmetic and restorative dentist Dennis Hartlieb, an adjunct associate professor at Marquette University, built Precision in Dental Restorations: From Veneers to Occlusion – Dental Online Training Mega Course from 13 separate technique courses totalling almost 17 hours, with PDF files. Each topic is split into bite-size clips — lecture first, then a hands-on demonstration — covering bicuspid veneers, Class II, IV and V composites, masking dark teeth, peg laterals, implant provisionals, photography and occlusion.
- 13courses
- 357lessons
- 16 h 55 minof video
What you’ll be able to do
- Prepare bicuspid veneers and V-onlays with a clear reduction plan
- Build tight, well-contoured Class II composites using sectional matrices, wedges and rings
- Layer a polychromatic Class IV restoration from a putty index and polish it to a natural lustre
- Hide dark or discoloured teeth under composite using opaquers and tints
- Seal a deep margin with resin margin elevation and shape custom implant provisionals
- Shoot a complete intraoral photo series and apply straightforward occlusion principles
Inside the course
Adhesion and posterior composites
The Class II course starts with total, self- and selective etch, polymerisation shrinkage and layering direction, then shows matrix selection, pre-wedging, Teflon tape support and cusp-by-cusp build-up. A short companion course compares clear, metal and modified bands and contact rings.
Anterior artistry
Class IV and Class V courses explain bevel design, dentin and enamel layers, microfill choice for abfraction lesions and finishing with discs and cups. The central incisor module covers width-to-length proportion, line angles and embrasures, and the peg lateral course runs to 54 clips of presentation and hands-on work.
The dark tooth problem
At 59 lessons, the masking course compares zirconia crowns and veneers with direct resin, explains opacity and tints, then follows a layer-by-layer technique through two patient cases.
Supporting skills
Dedicated modules teach veneer preparation on premolars, PEEK-based implant temporaries with a subgingival emergence profile, camera settings and photo views, and an introductory approach to occlusion.
Built for
- General dentists doing daily compositesSmall, repeatable technique steps you can apply at the next appointment.
- Cosmetic dentistsDetailed layering and masking protocols for demanding anterior cases.
- Newer graduatesShort clips make it easy to review a single step before treatment.
Curriculum
Bicuspid Veneer and V-onlay prep (1 h 55 min) 29 lessons
- Bicuspid Veneer Lecture – Part 1
- Bicuspid Veneer Lecture – Part 2
- Bicuspid Veneer Lecture – Part 3
- Bicuspid Veneer Lecture – Part 4
- Bicuspid Veneer Lecture – Part 5
- Bicuspid Veneer Lecture – Part 6
- Bicuspid Veneer Lecture – Part 7
- Bicuspid Veneer Lecture – Part 8
- Bicuspid Veneer Lecture – Part 9
- Bicuspid Veneer Lecture – Part 10
- Bicuspid Veneer Lecture – Part 11
- Bicuspid Veneer Lecture – Part 12
- Bicuspid Veneer Lecture – Part 13
- Bicuspid Veneer Lecture – Part 14
- Hands On Bicuspid Veneer Prep – Part 1
- Hands On Bicuspid Veneer Prep – Part 2
- Hands On Bicuspid Veneer Prep – Part 3
- Hands On Bicuspid Veneer Prep – Part 4
- Hands On Bicuspid Veneer Prep – Part 5
- Hands On Bicuspid Veneer Prep – Part 6
- Hands On Bicuspid Veneer Prep – Part 7
- Hands On Bicuspid Veneer Prep – Part 8
- Hands On Bicuspid Veneer Prep – Part 9
- Hands On Bicuspid Veneer Prep – Part 10
- Hands On Bicuspid Veneer Prep – Part 11
- Hands On Bicuspid Veneer Prep – Part 12
- Hands On Bicuspid Veneer Prep – Part 13
- Hands On Bicuspid Veneer Prep – Part 14
- Hands On Bicuspid Veneer Prep – Part 15
Class 2 Band and Rings (12 min) 7 lessons
- Intro
- Clear Matrix Bands
- Metal Bands
- Modified Metal Bands
- Contact Rings
- Secure Contact Rings Tip
- Thank you
Class 2 Composite (2 h 21 min) 40 lessons
- Part 1: Intro
- Part 1: Total Etch Overview
- Part 1: Maximize Bond Strength on Dentin
- Part 1: Self etch vs total etch
- Part 1: Bonding to enamel
- Part 1: Selective etch technique
- Part 1: Polymerization shrinkage
- Part 1: C factor and horizontal layering
- Part 1: Oblique Layering
- Part 1: Review sensitivity factors
- Part 2: Overview
- Part 2: Matrix bands
- Part 2: Clear contoured mylar band
- Part 2: Contact rings
- Part 2: Preoperative Evaluation
- Part 2: Pre-wedge
- Part 2: Extend onto Proximal Walls
- Part 2: Placing Matrix Band
- Part 2: Wedge Modification
- Part 2: Sectional Ring
- Part 2: Total Etch Technique
- Part 2: Convert class II to class I
- Part 2: Restore as Class I
- Part 2: Contour and Polish
- Part 2: Selective Etch Technique
- Part 2: Review
- Part 3: Placing a matrix band
- Part 3: Wedging
- Part 3: Adjusting a wedge
- Part 3: Placing contact rings
- Part 3: Teflon tape to support matrix
- Part 3: Applying adhesive
- Part 3: Applying flowable composite
- Part 3: Turn class II into class I
- Part 3: Open the occlusal embrasure
- Part 3: Building cusps part 1
- Part 3: Building cusps part 2
- Part 3: Adjusting marginal ridge height
- Part 3: Blending to proximal walls
- Part 3: Opening occlusal embrasure and final polish
Class 4 Composite Restoration – Polychromatic Approach (1 h 14 min) 32 lessons
- Lectures: Intro
- Lectures: Composite Materials
- Lectures: Adhesion
- Lectures: Bevel Design
- Lectures: Dentin Layer
- Lectures: Enamel Layer
- Lectures: Before you light cure
- Lectures: Light cure and initial contour
- Lectures: Secondary Anatomy and Polish
- Lectures: Enhance Polish
- Lectures: Review
- Materials: Materials
- Materials: Shade Selection
- Materials: Applying Adhesive
- Materials: Simulate Etch
- Materials: Creating lingual wall
- Materials: Dentin Layer
- Materials: Enamel Layer
- Materials: Check Final Contour
- Materials: Initial Contour with bur
- Materials: Refine Contour and Facial Lobes
- Materials: Polish restoration
- Materials: Enhance Polish
- Materials: Final Comments
- Putty Matrix: Intro
- Putty Matrix: Key Points for success
- Putty Matrix: Putty Matrix materials I like and why
- Putty Matrix: What you need before you start
- Putty Matrix: Creating putty matrix
- Putty Matrix: Remove excess
- Putty Matrix: Trimming your putty matrix to set you up for success
- Putty Matrix: Conclusion
Class 5 Composite Restoration (1 h 21 min) 35 lessons
- Part 1: Intro
- Part 1: Etiology
- Part 1: Chemical Erosion Factors
- Part 1: When to treat
- Part 1: Treatment Options
- Part 1: Advantages of Microfill Composites
- Part 1: Technique Overview
- Part 1: Preparation Design
- Part 1: Finishing Your Composite Beyond the Bevel
- Part 1: Adhesive Systems
- Part 1: Total Etch vs Selective Etch
- Part 2: Overview
- Part 2: Adhesion
- Part 2: Composite Placement avoiding shrinkage
- Part 2: Before your final cure
- Part 2: Initial Contour
- Part 2: Removing Cord
- Part 2: Finishing with Discs
- Part 2: Final Luster
- Materials: Materials
- Materials: Preparation
- Materials: Placing the bevel
- Materials: Simulate the etch
- Materials: Placing Adhesive
- Materials: Instrument Selection
- Materials: Placing First Increment
- Materials: Sculpting First Increment
- Materials: Placing Second layer
- Materials: Final Sculpting
- Materials: Contour with Burs
- Materials: Contour with Discs
- Materials: Finish With FlexiCups
- Materials: Polishing Steps
- Materials: Final Luster
- Materials: Review
Digital Dental Photography (38 min) 18 lessons
- Part 1: Full face
- Part 1: Smile Photos
- Part 1: Retracted Photos
- Part 1: Close-up shots
- Part 1: Occlusal Photos with mirror 01
- Part 1: Mandibular Occlusal Photos
- Part 1: Right Side Buccal Photos
- Part 1: Left Side Buccal Photos
- Part 1: Thank you
- Part 2: Intro
- Part 2: 5 Reasons To Utilize Dental Photography
- Part 2: Equipment
- Part 2: Exposure Triangle – F-stop
- Part 2: Exposure Triangle – Shutter Speed
- Part 2: Additional Settings
- Part 2: Tips
- Part 2: Patient Chair vs Stool
- Part 2: Review
Dental Resin Margin Elevation Technique (15 min) 8 lessons
- Intro
- Drilling and Finding the Caries
- Placing the Wedge
- Removing the Caries
- Seal Cervical Margin
- Dual Cure Auto Cure Technique
- Class I Technique
- Conclusion
Implant Provisionals (49 min) 27 lessons
- Lecture: Intro
- Lecture: Case Overview
- Lecture: Anesthetize
- Lecture: Seating Peek Abutment
- Lecture: Perfectly Fitted Vacuum Form
- Lecture: Access hole
- Lecture: Temporary Material
- Lecture: Creating Subgingival Form
- Lecture: Flowable Composites
- Lecture: Placement and Seal of Temporary Implant
- Lecture: Final Photos
- Materials: Materials
- Materials: Model and Vacuum Form Overview
- Materials: Placing Temporary Cylinder
- Materials: Temporary Cylinder Analysis and Vaseline Placement
- Materials: Creating Macro Retention
- Materials: Creating Lingual Space
- Materials: Access Hole
- Materials: Sealing Screw Access Hole
- Materials: Mirror Image
- Materials: Trim Temporary with a Coarse Disc
- Materials: Try temporary and adjust incisal edge
- Materials: Prep Temporary to apply flowable composite
- Materials: Apply Flowable Composite Demark
- Materials: OS1 Bur and Polishing Wheels
- Materials: Teflon Tape
- Materials: Conclusion
Masking Dark Prep (5 min) 6 lessons
- Intro
- Adhesive and Bonding Agent
- Pink Opaquer
- A1 Opaquer
- Finish Preparation and Polish
- Conclusion
Masking the Dark Tooth with Resin (2 h 22 min) 59 lessons
- Part 1: Which patients are candidates
- Part 1: Zirconia Crowns
- Part 1: Porcelain Veneers and Zirconia Veneers
- Part 1: Three Reasons to use Composite
- Part 1: Materials
- Part 1: Strength
- Part 1: Polishability
- Part 1: Where Nanofills fit in
- Part 1: Review and Layering
- Part 1: Opacity
- Part 1: The System I use
- Part 1: Opaquers
- Part 1: Why you need opaquers and how to use them
- Part 1: Pink Opaquer
- Part 1: Tints
- Part 1: Materials review
- Part 2: Intro
- Part 2: Adhesion Protocol
- Part 2: Application of Pink Opaque
- Part 2: Evaluate Value and Place Second layer of Pink Opaque
- Part 2: Lingual Wall
- Part 2: Lingual wall check points
- Part 2: Hybrid Layer
- Part 2: Hybrid Layer Evaluation
- Part 2: Opaquer layer Evaluation
- Part 2: Opaquer layer
- Part 2: White Tint
- Part 2: Grey tint
- Part 2: Facial Incisal Layer
- Part 2: Final Layer Placement
- Part 2: Final Sculpting Distal Area
- Part 2: Final Sculpting Mesio Area
- Part 2: Final Cure Tips and Consideration
- Part 2: Initial Contour
- Part 2: Gingival Margin and Facial Planes Sculpting
- Part 2: Incisal Edge View
- Part 2: Final Facial Contouring
- Part 2: Lingual and Interproximal Contouring
- Part 2: Initial Polish
- Part 2: Final Luster and Final Result
- Part 2: Managing Patients Expectations and Final Thoughts
- Clinical Case: Meet Steven
- Clinical Case: How much space you need
- Clinical Case: Prep and bond
- Clinical Case: Why you need Clear Liquid Resin
- Clinical Case: Pink Opaque Application
- Clinical Case: Dentin Layer
- Clinical Case: Creative Color Opaquer Vita Shade
- Clinical Case: Tints
- Clinical Case: Incisal and Gingival Microfill
- Clinical Case: Body Microfill
- Clinical Case: Proximal contacts
- Clinical Case: Meet Jackie
- Clinical Case: Prep Design
- Clinical Case: Adhesion and Pink Opaque
- Clinical Case: Dentin Layer
- Clinical Case: Opaquer and Tints
- Clinical Case: Enamel Layer
- Clinical Case: Final Results
Maxillary Central Incisor: Tooth shape and contour (38 min) 13 lessons
- Hands on: Hands-on Materials
- Hands on: Placement and Initial Sculpting
- Hands on: Final Sculpting
- Hands on: Finishing
- Hands on: Adding Facial Grooves
- Hands on: Polishing
- Hands on: Enhancing Polish
- Lecture: Course Intro
- Lecture: Central Width to Length Proportion
- Lecture: Planes
- Lecture: Line angles
- Lecture: Embrasure Spaces
- Lecture: Review
Occlusion made easy (2 h 22 min) 29 lessons
- Presentation – Part 1
- Presentation – Part 2
- Presentation – Part 3
- Presentation – Part 4
- Presentation – Part 5
- Presentation – Part 6
- Presentation – Part 7
- Presentation – Part 8
- Presentation – Part 9
- Presentation – Part 10
- Presentation – Part 11
- Presentation – Part 12
- Presentation – Part 13
- Presentation – Part 14
- Presentation – Part 15
- Presentation – Part 16
- Presentation – Part 17
- Hands On – Part 1
- Hands On – Part 2
- Hands On – Part 3
- Hands On – Part 4
- Hands On – Part 5
- Hands On – Part 6
- Hands On – Part 7
- Hands On – Part 8
- Hands On – Part 9
- Hands On – Part 10
- Hands On – Part 11
- Hands On – Part 12
Peg laterals (2 h 39 min) 54 lessons
- Presentation Peg Lateral – Part 1
- Presentation Peg Lateral – Part 2
- Presentation Peg Lateral – Part 3
- Presentation Peg Lateral – Part 4
- Presentation Peg Lateral – Part 5
- Presentation Peg Lateral – Part 6
- Presentation Peg Lateral – Part 7
- Presentation Peg Lateral – Part 8
- Presentation Peg Lateral – Part 9
- Presentation Peg Lateral – Part 10
- Presentation Peg Lateral – Part 11
- Presentation Peg Lateral – Part 12
- Presentation Peg Lateral – Part 13
- Presentation Peg Lateral – Part 14
- Presentation Peg Lateral – Part 15
- Presentation Peg Lateral – Part 16
- Presentation Peg Lateral – Part 17
- Presentation Peg Lateral – Part 18
- Presentation Peg Lateral – Part 19
- Presentation Peg Lateral – Part 20
- Presentation Peg Lateral – Part 21
- Presentation Peg Lateral – Part 22
- Presentation Peg Lateral – Part 23
- Presentation Peg Lateral – Part 24
- Presentation Peg Lateral – Part 25
- Presentation Peg Lateral – Part 26
- Presentation Peg Lateral – Part 27
- Hands On Peg Lateral – Part 1
- Hands On Peg Lateral – Part 2
- Hands On Peg Lateral – Part 3
- Hands On Peg Lateral – Part 4
- Hands On Peg Lateral – Part 5
- Hands On Peg Lateral – Part 6
- Hands On Peg Lateral – Part 7
- Hands On Peg Lateral – Part 8
- Hands On Peg Lateral – Part 9
- Hands On Peg Lateral – Part 10
- Hands On Peg Lateral – Part 11
- Hands On Peg Lateral – Part 12
- Hands On Peg Lateral – Part 13
- Hands On Peg Lateral – Part 14
- Hands On Peg Lateral – Part 15
- Hands On Peg Lateral – Part 16
- Hands On Peg Lateral – Part 17
- Hands On Peg Lateral – Part 18
- Hands On Peg Lateral – Part 19
- Hands On Peg Lateral – Part 20
- Hands On Peg Lateral – Part 21
- Hands On Peg Lateral – Part 22
- Hands On Peg Lateral – Part 23
- Hands On Peg Lateral – Part 24
- Hands On Peg Lateral – Part 25
- Hands On Peg Lateral – Part 26
- Hands On Peg Lateral – Part 27
Before you buy
Why are there so many lessons for 17 hours?
Every course is cut into very short segments, averaging under three minutes, so one clinical step equals one clip.
Are these live webinars?
They are recorded technique courses; you watch them at your own pace with no scheduled sessions.
Is anything included besides video?
PDF files accompany the recordings.
Do I get CME credit or a certificate?
No. Clinicapedia provides the educational content only — no CME or CE credits, MOC points or certificates of completion are included with this product.
Specifications
| Format | Video course bundle with PDF files |
|---|---|
| Instructor | Dennis B. Hartlieb, DDS |
| Contents | 13 courses · 357 lessons |
| Duration | 16 h 55 min |
| Access | Lifetime, self-paced |
| Department | Dentistry |
| Delivery | Instant download · lifetime re-download |
Related products

Anesthesiology